

No products in the cart.

Beginner’s Guide to Latte Art: 5 Easy Designs You Can Make at Home
Introduction
Have you ever stared at a beautifully decorated latte at your local café and thought, I could never do that at home? You’re not alone. Many new home baristas believe that latte art requires professional training, a high-end commercial machine, or years of practice. The truth is, with a few simple tips, the right technique, and a little patience, you can create stunning latte art designs right in your kitchen — even with a basic espresso machine.
In this guide, we’ll break down the fundamentals of latte art, walk you through five beginner-friendly designs, and share pro tips to help you avoid common mistakes. Whether you’re a casual coffee drinker or an aspiring home barista, this step-by-step tutorial will help you take your daily brew to the next level.
What You’ll Need: Tools & Ingredients
Before we dive into the designs, let’s cover the essentials you’ll need to get started. You don’t need a fancy setup — just these key items:
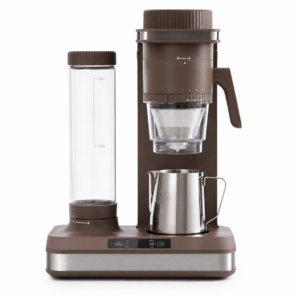
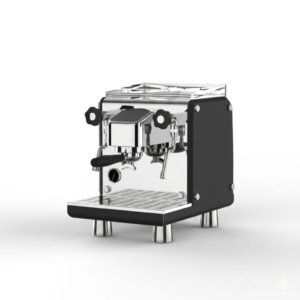
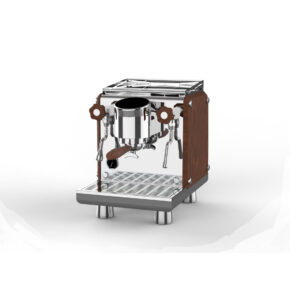
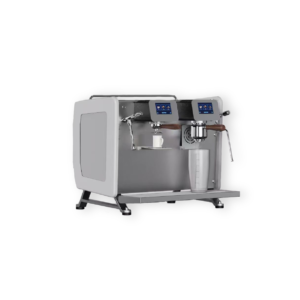
- An Espresso Machine A reliable espresso machine is the foundation of great latte art. Whether you’re using a compact home model or a semi-automatic machine, the goal is to pull a rich, crema-topped shot of espresso. For the best results, look for machines with stable temperature control and a powerful steam wand to create smooth, velvety microfoam.
- Fresh Whole Milk Whole milk works best for latte art because its fat content creates a creamy, stable foam that holds its shape. If you prefer plant-based options, oat milk is a great alternative — it froths well and has a mild, sweet flavor that pairs perfectly with coffee.
- A Stainless Steel Milk Pitcher A good pitcher with a pointed spout is essential for controlling the flow of milk as you pour. A 12–16 oz pitcher is ideal for home use, as it gives you enough room to swirl and texture the foam.
- A Thermometer (Optional) While not required, a thermometer can help you avoid overheating the milk, which can ruin the foam and make your coffee taste burnt. Aim to heat the milk to 150–160°F (65–70°C) — hot enough to steam but not scald.
The Key Step: Perfecting Your Microfoam
Before you can start pouring designs, you need to master the art of frothing milk into microfoam — the silky, tiny bubbles that make latte art possible. Here’s how to do it:
- Start with cold milk: Fill your pitcher halfway with cold, fresh milk. Cold milk gives you more time to create foam before it overheats.
- Purge the steam wand: Briefly turn on the steam wand to remove any water from the tip. This prevents large bubbles from forming in your foam.
- Submerge the wand: Place the tip of the steam wand just below the surface of the milk, slightly off-center. Turn on the steam at a low setting.
- Create a vortex: As the milk heats, you’ll hear a soft tearing sound — this means you’re incorporating air into the milk. Keep the wand just below the surface to create a gentle vortex that pulls the foam down into the milk.
- Heat to temperature: Once the milk has doubled in volume and reached 150–160°F, turn off the steam and remove the wand. Tap the pitcher on the counter to pop any large bubbles, then swirl it vigorously to create a smooth, glossy foam.
Your microfoam is ready when it looks like wet paint and has no visible bubbles. If it’s too bubbly, tap the pitcher and swirl again — practice makes perfect!
5 Easy Latte Art Designs for Beginners
Now that you’ve got your foam down, let’s move on to the fun part: pouring designs. Start with these simple patterns, and work your way up as you build confidence.
1. The Heart (The Classic Beginner’s Design)
The heart is the most basic latte art design, and it’s the perfect way to practice your pouring technique.
How to pour it:
- Hold your pitcher a few inches above the espresso shot and pour steadily to mix the milk and coffee.
- Once the cup is about halfway full, lower the pitcher closer to the surface of the coffee.
- Pour a steady stream of foam into the center of the cup, moving the pitcher back and forth slightly to widen the base of the heart.
- When the cup is almost full, lift the pitcher slightly and pull it straight up through the center of the heart to create the pointed top.
Pro tip: Keep your hand steady and pour at a consistent speed — rushing will make your heart lopsided!
2. The Tulip (A Simple Variation on the Heart)
The tulip is a step up from the heart, but it’s still beginner-friendly. It’s made by pouring multiple layers of foam into the cup.
How to pour it:
- Pour milk from a height to mix with the espresso until the cup is about one-third full.
- Lower the pitcher close to the surface and pour a small dot of foam in the center of the cup.
- Move the pitcher slightly to the side and pour a second dot, overlapping the first. Repeat this 2–3 times to create layers.
- When the cup is almost full, lift the pitcher and pull it straight up through the center to finish the tulip.
Pro tip: The more layers you add, the fuller your tulip will look — start with 2–3 layers, then work your way up.
3. The Rosetta Leaf (The “S” Shape Design)
The rosetta leaf is a classic design that uses a back-and-forth pouring motion to create a feather-like pattern.
How to pour it:
- Pour milk from a height to mix with the espresso until the cup is about halfway full.
- Lower the pitcher close to the surface, then move your hand back and forth in a gentle “S” motion as you pour.
- Keep the stream steady and the motion smooth — this will create the leaf’s “petals.”
- When the cup is almost full, lift the pitcher and pull it straight up through the center of the design to finish the stem.
Pro tip: The key to a clean rosetta is keeping your motion slow and controlled — avoid moving too fast, or the pattern will blur.
4. The Swirl (No Fancy Pouring Required)
If you’re still getting the hang of pouring, the swirl is a great backup design that’s easy to make and still looks impressive.
How to pour it:
- Pour milk into the espresso from a height to mix thoroughly, creating a light brown base.
- Once the cup is almost full, hold the pitcher close to the surface and pour a small circle of foam in the center.
- Use a toothpick or the tip of your steam wand to drag lines from the center of the circle outwards, creating a starburst or spiderweb pattern.
Pro tip: You can also drag a single line through the center of the circle to create a simple heart shape — it’s a quick hack for when your pouring doesn’t go as planned!
5. The Simple Rosetta (A Smaller, Easier Version)
The simple rosetta is a mini version of the classic leaf design, perfect for small cups or when you’re short on practice.
How to pour it:
- Pour milk from a height to mix with the espresso until the cup is about two-thirds full.
- Lower the pitcher close to the surface and pour a small, wavy line across the center of the cup.
- When the cup is full, lift the pitcher and pull it straight up to finish the stem.
Pro tip: This design works great in 4–6 oz cortados or macchiatos, where the foam is thinner and easier to control.
Common Mistakes to Avoid
Even experienced baristas make mistakes — here are the most common issues new home baristas face, and how to fix them:
- Bubbly foam: If your foam has large bubbles, tap the pitcher firmly on the counter and swirl it vigorously before pouring. Practice steaming the milk to create a smoother vortex.
- The design disappears: If your pattern sinks into the coffee, you’re pouring too high or too fast. Lower the pitcher closer to the surface and pour more slowly.
- The crema breaks: The crema (the golden-brown top layer of espresso) is essential for latte art. To keep it intact, pour milk from a height to mix with the espresso before lowering the pitcher for your design.
- The milk is too hot: Overheated milk tastes burnt and ruins the foam. Stop steaming when the pitcher feels warm to the touch, not hot.
Final Thoughts & Next Steps
Latte art is all about practice — don’t get discouraged if your first few pours don’t turn out perfectly. Even professional baristas spend years honing their skills! The key is to focus on mastering your microfoam first, then work on your pouring technique.
If you want to see these designs come to life, follow us on TikTok! We share quick tutorials, behind-the-scenes barista hacks, and real-time demos of all these patterns — plus sneak peeks of our latest coffee gear. Whether you’re a beginner or looking to upgrade your setup, Westeez has you covered with reliable espresso machines and accessories built for every skill level.
Join our growing community of coffee lovers today, and let’s brew something amazing together.
👉 Follow us: @westeez.com
Happy brewing! ☕️


Add comment
You must be logged in to post a comment.